22. OOP: Objected-oriented Programming
In these notes you will learn:
- How to write simple classes.
- How to write and use constructors.
- How to add functions to a class.
22.1. Introduction
Object-oriented programming, or OOP for short, is a popular style of programming supported by most modern programming languages.
OOP works well in graphics and animation. The idea is that every animated thing on the screen has a corresponding object in the program. This approach makes many programs simpler and more flexible.
22.2. Ball Objects
The best way to understand OOP is through an example. Suppose we want to draw a ball on the screen at some (x, y) location. Here’s how we’ve been doing it without OOP:
void setup() {
   size(500, 500);
   smooth();
}

void draw() {
  background(255);

  fill(255, 0, 0);
  noStroke();
  ellipse(250, 250, 150, 150);
}
This style of programming is sometimes called procedural programming, and it emphasizes the statements used for displaying the circle.
An OOP approach starts out very differently. In OOP, we first decide what object we are representing. In this case its a ball, and so we should start to think of a ball as being its own object independent of any particular program.
Next we need to tell Processing what a ball is by writing a class:
class Ball {
   float x;        // (x, y) is the center of the ball
   float y;
   float diameter;
}
A class is a collection of all the variables (and, later, functions) that an object can contain. This class says that objects of type Ball contain three float variables: x, y`, and ``diameter.
Now we can write our program in an OOP style:
class Ball {
  float x;        // (x, y) is the center of the ball
  float y;
  float diameter;
}

Ball b;

void setup() {
  size(500, 500);
  smooth();
  b = new Ball();
  b.x = 250;
  b.y = 250;
  b.diameter = 150;
}

void draw() {
  background(255);

  fill(255, 0, 0);
  noStroke();
  ellipse(b.x, b.y, b.diameter, b.diameter);
}
Note
Obviously, this is more work than drawing a single ball! If you know that your program will only ever use one ball, then there’s no reason to write a class for it. OOP tends to work best with medium-size to large-size programs.
Lets look this program in detail. To create a Ball we need two things:
A variable of type Ball, e.g.:
Ball b;
This statement defines the variable b, which is of type Ball.
b is initialized to a special default value called null. The null value in Processing means that the variable does not point to an object yet.
An object for b to point to:
void setup() {

  // ...

  b = new Ball();

  // ...

}
The expression new Ball() creates a brand new Ball object. Every Ball object is guaranteed to contain its own personal copy of the three variables listed in the Ball class — x, y, and diameter.
Variables in an object are accessed using dot notation. For example:
b.x = 250;
b.y = 250;
b.diameter = 150;
Since b refers to an object of type Ball, we know that b.x refers to the x variable of that particular Ball object.
22.3. Constructors
A problem with the OOP version of the above program is that it needs a lot of code just to initialize the object:
b = new Ball();
b.x = 250;
b.y = 250;
b.diameter = 150;
To shorten and simplify initialization, Processing provides special called constructors.
Lets add a constructor to our Ball class:
class Ball {
  float x;        // (x, y) is the center of the ball
  float y;
  float diameter;

  // constructor
  Ball(float init_x, float init_y, float init_diameter) {
    x = init_x;
    y = init_y;
    diameter = init_diameter;
  }
}

Ball b;

void setup() {
  size(500, 500);
  smooth();
  b = new Ball(250, 250, 150);
}

void draw() {
  background(255);

  fill(255, 0, 0);
  noStroke();
  ellipse(b.x, b.y, b.diameter, b.diameter);
}
Now we can create and initialize the ball in a single statement:
b = new Ball(250, 250, 150);
This code is certainly shorter than what we had before!
The constructor is a special kind of a function that follows a couple of extra rules that you need to know about:
- A constructor’s name is always exactly the same as the name of the class it is in.
- A constructor has no return type (not even void).
Constructors typically initialize an object’s variables. It also sometimes to do other things, e.g. checking that the value of a variable is within an expected range. For instance, this constructor checks that the diameter of the ball is positive:
Ball(float init_x, float init_y, float init_diameter) {
   x = init_x;
   y = init_y;
   if (init_diameter <= 0) {
      println("Error: diameter of a ball must always be positive");
      exit();  // immediately quit the program
   }
   diameter = init_diameter;
}
Having constructors to validate data like this is very useful: it’s now impossible for a program to create a ball with a non-positive diameter. For instance, if you call new Ball(250, 250, -150), then the program prints an error message and immediately stops (thanks to the exit() statement).
Note
Of course, nothing stops a programmer from later changing diameters value to, say, -46. There are techniques that can handle even that problem.
22.4. A Ball that Draws Itself
Another nice improvement we can make to the OOP version of our program is to add a function to Ball that handles drawing:
class Ball {
  float x;        // (x, y) is the center of the ball
  float y;
  float diameter;

  Ball(float init_x, float init_y, float init_diameter) {
    x = init_x;
    y = init_y;
    if (init_diameter <= 0) {
      println("Error: diameter of a ball must always be positive");
      exit();  // immediately quit the program
    }
    diameter = init_diameter;
  }

  void render() {
    fill(255, 0, 0);
    noStroke();
    ellipse(x, y, diameter, diameter);
  }
}
Here we’ve added the render() function to Ball. As you can see, it is almost identical to the code in draw(). The only difference is that when we call the ellipse function we don’t write b.x, b.y, and b.diameter. That’s because all the functions inside a class have direct access to any variables declared in the class.
Note
Some programmers name the function that draws the ball draw() instead of render(). That’s fine, but we prefer the name render() to avoid confusion with the draw() function in the main program.
With this change, the main part of our program becomes short and simple:
// ... Ball class defined as above ...

Ball b;

void setup() {
  size(500, 500);
  smooth();
  b = new Ball(250, 250, 150);
}

void draw() {
  background(255);

  b.render();
}
The draw() function is now just two lines long! Of course, all that we’ve really done is move the code that used to be in draw() into our Ball class. Yet it makes the program a little more readable, and a little easier to understand. In big programs little improvements like this add up and can help prevent bugs.
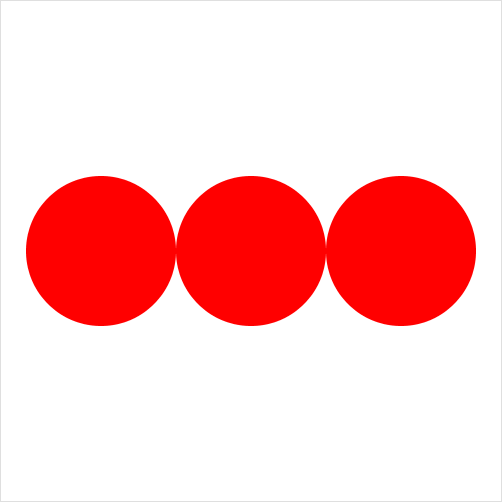
22.5. Example: Three Balls
There’s no limit to how many Ball objects we can make (beyond, of course, the amount of RAM your computer has). So, lets use Ball in a new program that draws three balls.
We will use the same version of Ball as in the last program:
class Ball {
  float x;        // (x, y) is the center of the ball
  float y;
  float diameter;

  Ball(float init_x, float init_y, float init_diameter) {
    x = init_x;
    y = init_y;
    if (init_diameter <= 0) {
      println("Error: diameter of a ball must always be positive");
      exit();  // immediately quit the program
    }
    diameter = init_diameter;
  }

  void render() {
    fill(255, 0, 0);
    noStroke();
    ellipse(x, y, diameter, diameter);
  }
}
The rest of the code looks like this:
Ball a;
Ball b;
Ball c;

void setup() {
  size(500, 500);
  smooth();
  a = new Ball(100, 250, 150);
  b = new Ball(100 + 150, 250, 150);
  c = new Ball(100 + 2*150, 250, 150);
}

void draw() {
  background(255);

  a.render();
  b.render();
  c.render();
}
In practice, OOP is often used in this way: one programmer creates a general-purpose class like Ball, and other programmers use it in their programs.
22.6. Box Objects
Lets create another simple object: a rectangular box. We start by writing a class that describes the contents of a box object:
class Box {
   // ...

}  // class Box
A box should have at least these attributes:
- An (x, y) position. Lets agree that (x, y) is its upper-left corner.
- A width and height.
- A fill-color (we will ignore the stroke color).
Each of these attributes becomes a variable in the class:
class Box {
   float x, y;
   float width, height;
   color fillColor;

   // ...

}  // class Box
Now we should create a constructor to initialize the variables:
class Box {
  float x, y;
  float width, height;
  color fillColor;

  // constructor
  Box(float init_x, float init_y,
      float init_width, float init_height,
      color init_fillColor) {
     x = init_x;
     y = init_y;
     width = init_width;
     height = init_height;
     fillColor = init_fillColor;
  }

  // ...

}  // class Box
Remember that a constructor is a special kind of function that always has the same name as the class, and has no return type (not even void).
As with Ball, lets add a render function:
class Box {
  float x, y;
  float width, height;
  color fillColor;

  Box(float init_x, float init_y,
      float init_width, float init_height,
      color init_fillColor) {
     x = init_x;
     y = init_y;
     width = init_width;
     height = init_height;
     fillColor = init_fillColor;
  }

  void render() {
    fill(fillColor);
    noStroke();
    rect(x, y, width, height);
  }

}  // class Box
Now we can use it to write programs like this:
Box a;

void setup() {
  size(500, 500);
  smooth();

  a = new Box(10, 10, 20, 120, color(255, 0, 0));
}

void draw() {
  background(255);

  a.render();
  a.x = mouseX;
  a.y = mouseY;
}
22.7. Rotating the Box
Lets make one more change to the Box class: lets allow boxes to be rotated around their center point.
We will need a variable to keep track of the box’s current angle. Lets call that variable angle, and add it to the Box class:
class Box {
  float x, y;
  float width, height;
  float angle;
  color fillColor;

  Box(float init_x, float init_y,
      float init_width, float init_height,
      color init_fillColor) {
     x = init_x;
     y = init_y;
     width = init_width;
     height = init_height;
     fillColor = init_fillColor;
     angle = 0;
  }

  void render() {
    fill(fillColor);
    noStroke();
    rect(x, y, width, height);
  }

}  // class Box
Initially, angle is 0, i.e. the box is not rotated at all. Notice that we do not include angle as an input parameter in the constructor. There’s no deep reason for that: it just seems that for many uses a starting angle of 0 is useful, and so there’s no need to require the user to specify that every time they create a box.
Now that we have angle in place, we need to modify render() to draw the box with it. If you’ve read the notes on translation and rotation, then you know this will involve using:
- pushMatrix to save the state of the screen’s coordinate system before we rotate the box;
- translate to move the origin to the center of the box;
- rotate to rotate the origin around the coordinate system’s origin;
- popMatrix to restore the coordinate system the location and angle it was at before the corresponding call to pushMatrix.
Here is the modified render() function:
void render() {
  pushMatrix(); // save current coordinate system

  fill(fillColor);
  noStroke();

  // move the origin to the center of the box
  translate(x + width / 2, y + height / 2);

  // rotate coordinate system angle degrees around origin
  rotate(radians(angle));

  // draw that box so that it's upper-left corner is
  // at (x, y)
  rect(-width / 2, -height / 2, width, height);

  popMatrix(); // restore original coordinate system
}
Read the comments in the code to see what is happening. It can be tricky to get things right using translate, rotate, pushMatrix, and popMatrix, and so you should try to understand every single function call. Sketching what happens on a piece of graph paper may be helpful here.
Now that boxes can rotate, we can write code like this:
Box a, b;

void setup() {
  size(500, 500);
  smooth();

  a = new Box(100, 100, 20, 120, color(255, 0, 0));
  b = new Box(350, 350, 20, 120, color(0, 255, 0));
}

void draw() {
  background(255);
  a.render();
  a.angle += 1;

  b.render();
  b.angle += -1.75;
}
This program shows two different rectangles rotating independently around their centers. It is much simpler to rotate objects like this than to do it directly using the basic rotation techniques
22.8. Questions
What does OOP stand for?
True or false: the name of a constructor is always the same as the name of the class it is inside of.
What is the return type of a constructor?
Consider the following class for representing a 2-dimensional point:
class Point {
   float x;
   float y;
}
- Write Processing code that creates a new Point object and sets its x variable to 4 and its y variable to 2.
- Add a constructor to the Point class that assigns x and y initial values.
Consider this class for representing a person:
class Person {
   String name;
   int age;
}
- Write Processing code that a new Person object and sets the name variable to Darth Mocha and the age variable to 75.
- Add a constructor to the Person class that assigns name and age initial values.
22.9. Programming Questions
As given in the notes, the final version of the Ball class always draws red balls. Lets modify it to draw a ball of any given color. Make the following two changes to Ball:
Add a new variable c of type color under the declaration of diameter inside Ball.
Modify the constructor for Ball so that it takes an initial color as input, e.g. so we can write code like this:
Ball colorful = new Ball(250, 250, 100, color(0, 140, 0));
Change Balls render() function so that it sets the fill to be c instead of red.
Test your changes by modifying the program that draws three balls on the screen so that each ball has a different color.
Add a function called getRadius() to the Ball class that returns the radius of the ball (recall that the radius is half the diameter). For example:
Ball a = new Ball(100, 100, 10);
float radius = a.getRadius();   // radius is 5
Add a function called getArea() to the Ball class that returns the area of the ball. For example:
Ball a = new Ball(100, 100, 10);
float area = a.getArea();   // area is 78.54
Recall that if a circle has radius \(r\) , then its area is \(\pi r^2\) .
Using the Ball class, write a program that makes a ball follow the mouse pointer. It should leave no trail.
Using the Ball class, write a program that lets a user drag-and-drop a ball around the screen.
In the constructor for Box, add if-statements that ensure the width and height of the box are both greater than 0. Use exit() to immediately halt the program if either the width or height is 0 or less.
Write a program that uses Box objects to draw the flag of Romania:

Add a function called getArea() to the Box class that returns the area of the box. For example:
Box b = new Box(100, 100, 10, 4, color(0));
float area = b.getArea();   // area is 40
Write your own class called StickFigure that can be used to draw a person in stick-figure form. Your StickFigure class should have at least the following:
A constructor that lets you set the (x, y) position of the stick figure on the screen.
A function called render() that, when called, draws the stick figure at location (x, y) on the screen.
You don’t need to make your stick figure drawing very complicated, but it should contain at least three lines and ellipse.
When it’s done, you should be able to use StickFigure test it using this exact program:
StickFigure guy;

void setup() {
   size(500, 500);
   smooth();

   guy = new StickFigure(200, 100);
}

void draw() {
   background(255);

   guy.render();
}
Write a program that makes a StickFigure object from the previous question follow the mouse pointer around the screen (without leaving a trail).
Modify the version of Box with angle so that (x, y) refer to the box’s center point instead of its upper-left corner. Test this change on a program that makes a rectangle follow the mouse pointer around the screen; the pointer should stay at the center of the rectangle no matter its angle.