File/New, select Project tab, then select MFC AppWizard (exe)
Type in your executable/project name MYPR.
Step 1. Select SDI (ie. Netscape, Explorer), MDI (ie. Word.Excel), Dialog based (ie. Calculator, Minesweeper) application type.
Step 2. Database support (DAO, OLE DB), pick default (none)
Step 3. container, server, automation, active X; pick default.
Step 4. toolbar, status bar, printing, support, MFC AppWizard provides all these hooks, so if you think you may need them in you program at some time, then check box, it can become messy to include it later on.
Step 5. Choose Link MFC as Shared DLL, otherwise your program will be very large and may not be submitted to webserver
Step 6. Shows the MFC app classes and files that will be automatically generated. To have a form as the primary view, click on the CMYPROJView class and change the base class to CFormView.
In the left hand window there is the project workspace (left hand window). You know the Class and File views. Also make use of the Infoview, which has the online help and samples and tutorials.
The Resource View tab is the visual programming side of VC++ and integrated with MFC.
Dialog has the form views and popup dialogs in the app.
Accelerator has the short cut keys for different events, buttons, menu items.
Icon has icons in the app which can be edited.
Menu, String table, and Toolbar can be edited.
Click on the dialog resource IDD_MYPR_FORM, empty front page.
There are various Windows UI controls to be added to your view:
static text box (use as labels), edit text box for user input, check box, radio button, list box, combo box, scroll bar, spin control, tab control, tree control, etc.
Use Rclick on new control (like button, listbox) and select Properties in the popup menu
to edit the Caption or ID or any other properties of the control.
Use ctrl-t to view dialog (or form) without having to compile and run.
a) Create a button called ADD on the formview.
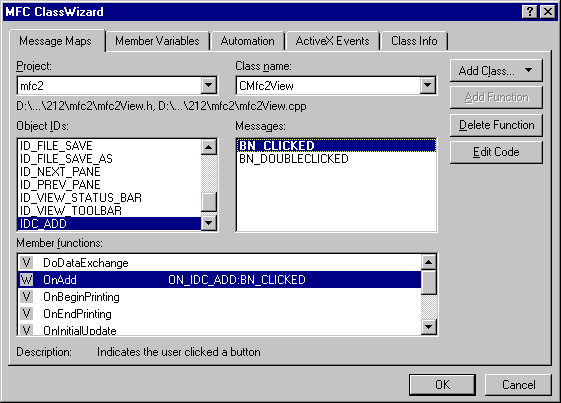
Double click or Rclick and choose Class Wizard from button (or any control).
In Message Maps folder, for the button ADD, there is are two possible messages, Click and Dclick. You can create a member function to handle either or both of these events.
Dclick on BN_CLICKED or click Add function button; call your event handler OnAdd().
Dclick on the function name or press Edit code button, and it takes you to the CMYPRView::OnAdd() method.
b) Create an Editbox and in Class Wizard attach a member variable to it, m_editbox.
Compile and run.
Need to call UpdateData(false) and UpdataData(true) to read from and write to all controls. UpdateData() actually calls member function DoDataExchange().
The body of your OnAdd() will look like:
UpdateData(true);
m_editbox += "+";
UpdateData(false);
Compile & run. Input text in edit box, then press button ADD, notice the plus sign is added to end of text.
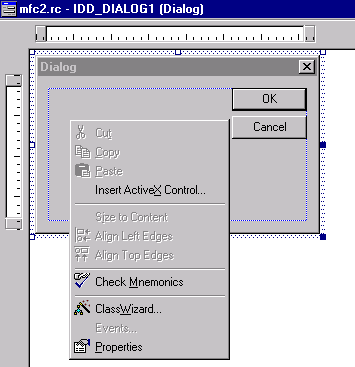
c) Creating a popup dialog
Create a popup dialog, and add it to menu item (or any event handler like button click). Rclick on Dialog folder and choose Insert Dialog. Rclick in the dialog and chose Class Wizard.
Class Wizard will ask to create a class associated with this dialog, hit OK.
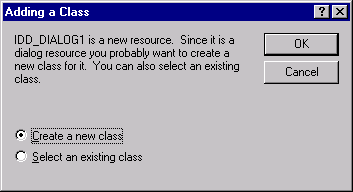
Enter the class name POP for your dialog. Notice, this is derived from the MFC class CDialog base class. You can also see a list of other bases classes available.
If you want to popup this dialog from an event handler (ie. Menu item or button click, etc.), you need to have the following code in your member function:
POP pup;
pup.DoModal();
DoModal() is a member function of the base class CDialog.
Don’t forget to #include "POP.h" somewhere before the code.
Buttons in a dialog with ID’s IDOK and IDCANCEL have default handlers in the base class method DoModal() (they can be overridden). Also DoModal() can have a return values.
For next class, try to do the following practice exercise.
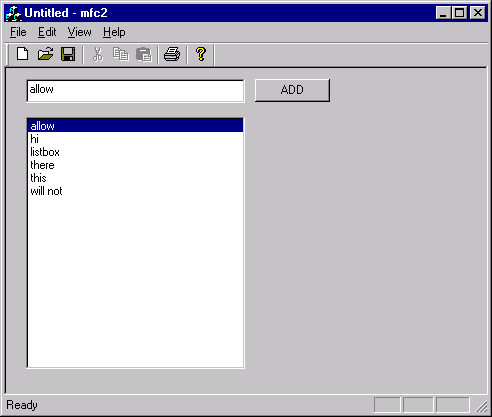
Create an Editbox with an ADD button and a Listbox below. Allow the user to enter text into the Editbox, and when the ADD button is pressed, add the string in the Editbox to the Listbox (if this string is non-empty). Do not allow duplicate strings in the Listbox.
You need to make a CListBox member variable and use ClistBox member functions. Also when a string in the listbox is selected, put this string in the Editbox.
Use the on-line help, the samples and your wits to get into the swing to MFC programming.
Also, for next class, try the Scribble tutorial, and/or the MFCCALC sample so you can be prepared for more MFC programming.