Fonts
In these notes you will learn:
- How to create Processing font files (.vlw files) using the Processing editor.
- How to load fonts from disk and display them.
Introduction
We’ve seen that println can display strings on the console window. But
what if you want a string to appear in the graphics window? That’s more
involved because fonts — the images representing the characters — have
so many different properties. If you’ve ever played around with a word
processor, then you have some idea of the complexity of fonts. You can specify
its location, style, size, weight (i.e. thickness of stroke), color, and more.
Hundreds of different fonts have been created, and choosing good ones takes
skill and experience.
Processing makes it relatively easy for you to use lots of different kinds of fonts. To use a font in Processing, follow these 4 basic steps:
Create the
.vlwfile that stores the font images. The Processing IDE provides a handy tool for creating font files for a variety of fonts.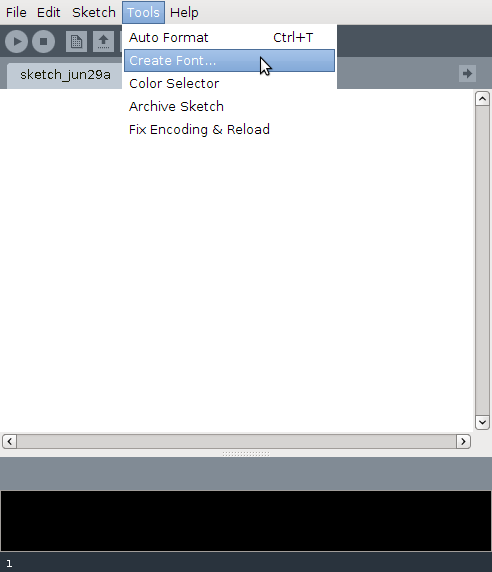
Once you know a font file exists, then you load it from the disk into memory using the
loadFontfunction.After a font has been loaded into memory, you set it as the font to be used with the
textFontfunction.Finally,
text(s, x, y)displays stringsat location (x,y) using the font set by the most recent call totextFont.
Creating Fonts in the Processing IDE
As an example of how to use fonts in Processing, lets write a program that prints “Hello everybody!” on the screen.
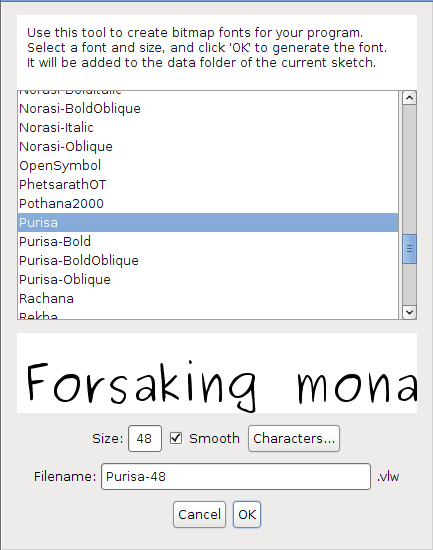
The first step is to choose a font. Look at the list of fonts in the Tools/Create Font menu in the Processing IDE and choose a font you like. I’ll choose “Purisa” at size 48. After clicking “OK”, this creates a file called “Purisa-48.vlw” that stores all the font images.
The second step is to load the font file we’ve just created in Processing:
PFont font;

void setup() {
  size(500, 500);
  font = loadFont("Purisa-48.vlw");
  // ...
}

void draw() {
  // ...
}
Notice that we need to use a global variable of type PFont
to store the result of calling loadFont. PFont is the main Processing
class for representing fonts in memory.
Note
As it explains on the loadFont documentation page, the font file needs to
be in your programs data folder, i.e. a folder called data that is
in the same folder as your source code file. You’ll get a “Could not load
font ...” error if the font .vlw file is not there.
The third step is to set the just-loaded font as the current font to use. This
is simply a matter of calling the textFont function:
PFont font;

void setup() {
  size(500, 500);
  font = loadFont("Purisa-48.vlw");
  textFont(font);
}

void draw() {
  // ...
}
Our Purisa font is size 48, but you can change it’s size in textFont, e.g.
textFont(font, 32) would make the font a little smaller.
Warning
Changing the size of a font using textFont often
results in visual blemishes such as jagged edges or blurriness. To ensure
your fonts look good, it’s usually best to create them at the desired size
using the Processing IDE font creation tool instead of changing their size
in textFont.
Finally, we are ready to place the text on the screen:
PFont font;

void setup() {
  size(500, 500);
  font = loadFont("Purisa-48.vlw");
  textFont(font);
}

void draw() {
  background(0);

  text("Hello everybody!", mouseX, mouseY);
}
If your program happens to use more than one style of font, then you must
remember to call textFont before each call to text. For example:
PFont helloFont;
PFont goodbyeFont;

void setup() {
  size(500, 500);
  helloFont = loadFont("TeXGyreSchola-Italic-48.vlw");
  goodbyeFont = loadFont("TeXGyreChorus-MediumItalic-48.vlw");
}

void draw() {
  background(0);

  textFont(helloFont);
  text("Hello!", mouseX, mouseY);

  textFont(goodbyeFont);
  text("Bye bye!", mouseY, mouseX);
}
You can also change the size of a font in the textFont command, e.g.:
PFont font;

void setup() {
  size(500, 500);
  font = loadFont("TeXGyreSchola-Italic-48.vlw");
}

void draw() {
  background(0);

  textFont(helloFont, mouseX);
  text("Hello!", 50, 450);
}
One problem with this way of changing a font’s size is that they can look
blurry/blocky at extreme sizes. To ensure smooth, nice-looking fonts you
generally need to create a .vlw files for every different size of font you
want to display.
Questions
- Name 5 different properties of fonts.
- Answer true or false for each of the following statements.
- The Processing IDE comes with a font creation tool that lets you create your own .vlw font files.
- The
loadFontfunction loads .vlw files into memory. - The
textFontfunction returns the name of the font that will be used when text is drawn on the screen. - The function
print(x, y, s)displays stringsat location (x,y) on the screen.
- What is the name of the class Processing uses to represent fonts?
- What is a potential problem of using
textFontto change the size of a font?
Programming Questions
- Write a program that puts
Hello everybody!5 times on the screen (not the console!). Use 5 different fonts and five different colors. - Write a program that puts the string
I like red apples.on the screen (not the console!) all on one line. The wordredshould be colored red, and in a different font, than the rest of the string in a different color.