Uploading with CyberDuck
These instructions will be for uploading with CyberDuck. It is available for both Windows and OSX. The screenshots here are OSX, but it looks similar in Windows
You can also watch the video tutorial on uploading files. It follows the same steps as the instructions here: use whichever instructions you prefer (or both).
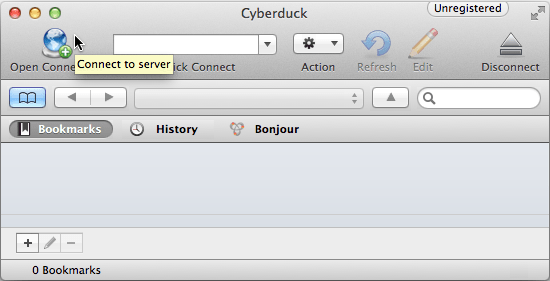
First, you'll need to install CyberDuck (you can accept all of the defaults in the installer) and start the program. Once the program is started, “Open Connection”.
Select the “SFTP (SSH File Transfer Protocol)” option, because that's how you need to connect to the server.

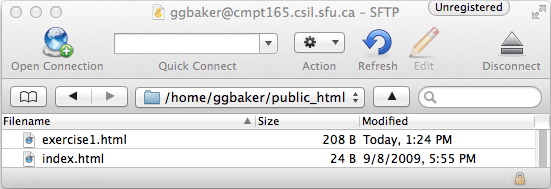
For the connection, use the server cmpt165.csil.sfu.ca, and your usual SFU username and password.
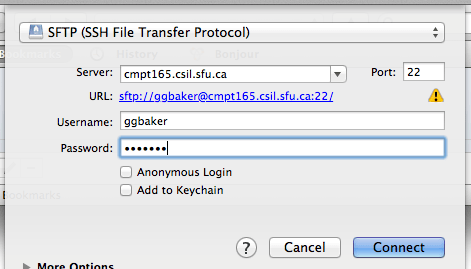
The first time you connect, you'll be asked to verify the server's “fingerprint”. You can accept the one given.
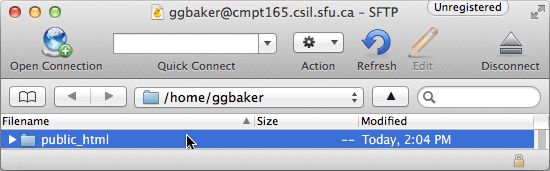
In your home directory, you'll see a folder public_html. All of your web content must go in there: double-click to go into that folder.
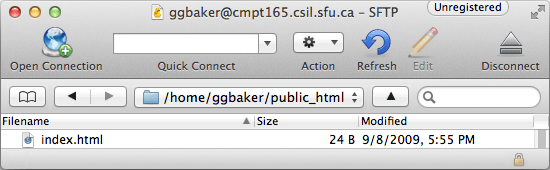
When you start the course, you should see a file index.html in there.
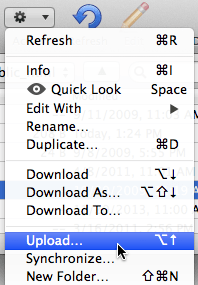
From the “actions” menu, select “Upload…”.
Find the .html file on your computer and upload it. After that, you should see it in the folder.
Then you should be able to open a web browser, and type the URL of that resource to find it. It should be http://cmpt165.csil.sfu.ca/~userid/filename.html . (Substitute your SFU userid for userid and your filename for filename.html.)
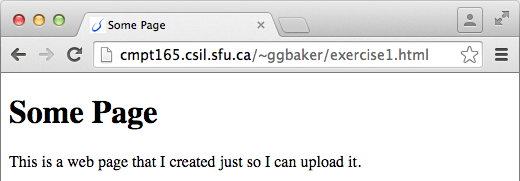
In URLs, case matters, so filename.html and FILEname.html will have different URLs. Make sure your URL matches your filename.