|
Printable version of this webpage
Installing Cygwin
Requirements for Installing Cygwin
- Your computer must be running the Windows Operating System
- You need at least 300-350 MB of available disk space
- You must use a windows account with administrator privilege.
- You will need a high speed internet connection (cable or ADSL).
If you do not have a high speed connection at home I suggest you work only in the CSIL lab.
Step by Step Installation of Cygwin
If your computer and internet connection meet the four requirements above you can install Cygwin, and have
a linux like environment available on your Windows machine. To install Cygwin and related software use
the following step by step instructions:
- Go to the Cygwin site.
- Click on Install
 or Update Now or Update Now
 . .
- This will save the setup.exe file to your computer.
The location you save the setup.exe is not critical but you need to remember where the
setup.exe file is so you can update or remove your Cygwin system later.
Saving setup.exe to your desktop makes it easy to find.
- Execute the setup program from your computer. (click on the icon for the
 setup.exe file ).
A window labeled “Cygwin Net Release Setup Program” should appear. setup.exe file ).
A window labeled “Cygwin Net Release Setup Program” should appear.
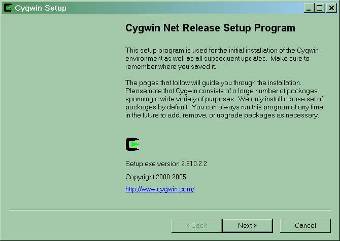
- Press “Next” to begin installing Cygwin on your windows computer.
- There are two approaches to downloading all the necessary files to your computer.
- Easiest Method: You may accept the default (Install from the Internet),
this will help you download then install all required files.
- Alternate Method: You may choose “Download Without Installing”.
The setup program will then download all the files you will need to install Cygwin.
After you complete downloading you will need to execute the install program again to
install Cygwin using the previously downloaded files.
When executing the setup program to install Cygwin from already downloaded files
select “Install From Local Directory”.
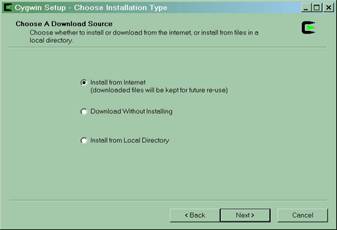
The rest of this set of installation instructions assumes you have chosen
“Install from Internet”.
- After choosing “Install from Internet” press “Next” to bring up the following window.
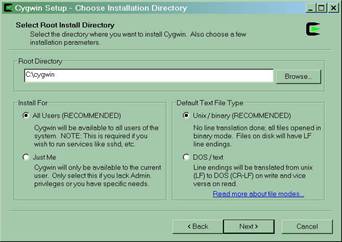
In the “Root directory:” field use C:\cygwin as your root directory.
This is where your Cygwin system will be installed. The default (already selected) options
for “Install For” and “Default Text File Type” should be chosen, as illustrated in the
window shown immediately above. If your default options are different from those illustrated
it probably means your account does not have administrator privilege and your installation
will likely not function correctly. -
- Pressing “Next” after these options have been selected will bring up the following window.
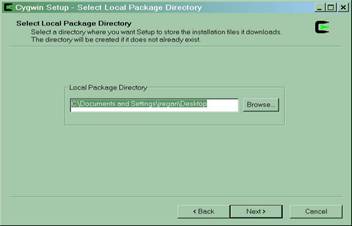
To keep all your Cygwin information together choose C:\cygwin\package as your local package
directory as shown above (This means all downloaded files are stored in C:\cygwin\package)
- Pressing “Next” after choosing the package directory will bring up the following window.
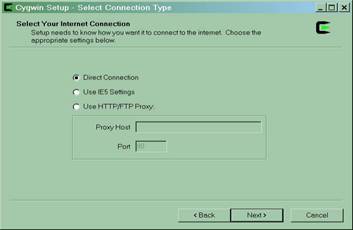
In the “Select Connection Type” window, select Direct Connection
(you must have a high speed cable or ADSL connection to the machine on which you are
installing Cygwin, the connection may be wired or wireless and may pass through a router
or switch)
- Pressing “Next” after selecting “Direct Connection” will bring up the following window.

In the “Choose Download Site” window select a download site. Any download site will work,
but some are faster or busier than others. Choosing a North American site
(.org, .net, .com, .ca) is usually most efficient.
The site highlighted above has worked well for me recently. -
- Pressing “Next” after selecting your download site will bring up the following window.
This window shows the progress in connecting to your download site and getting set up to download
the files you need to install Cygwin. When the setup tool initialization is complete
the window be replaced by the following window
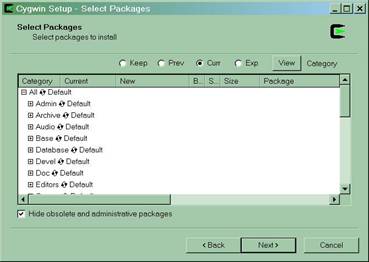
- Pressing “Next” immediately will install a default (minimal) version of Cygwin.
To work from home using Cygwin you will need packages in addition to the default installation.
Steps 15 and 16 explain how to select the necessary packages.
- Select a group of additional packages by pressing the
 beside the name of the group. For 102 you should select Python and Gnome groups.
To select a group press the once to change
“Default” to “Install”. If you press more than once other options will appear,
the options cycle so keep pressing until you select “Install”. Below is an example showing
how your selection window should look before and after you select the Gnome group.
beside the name of the group. For 102 you should select Python and Gnome groups.
To select a group press the once to change
“Default” to “Install”. If you press more than once other options will appear,
the options cycle so keep pressing until you select “Install”. Below is an example showing
how your selection window should look before and after you select the Gnome group.
Before selecting Gnome

After pressing the beside Gnome to Select Gnome
After selecting Gnome use the same procedure to select Python.
- Next, select only some of the packages within other groups, To select part of a group press the
+ to the left of the group name. This will expand that group, providing a list of all
its members, as shown in the window below.
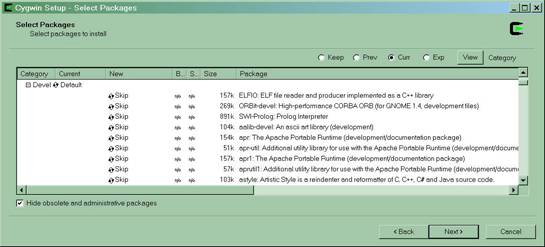
The members of each group are in alphabetical order so you can find them easily.
As an example consider the Devel group part of which is illustrated above.
From the Devel group you need to select several packages
(ddd, gcc C compiler upgrade helper, gdb, splint).
As an example, consider selecting the C compiler,
the tool that allows you to program in the C language. Scroll down the list until you
find "gcc C compiler helper". Select by clicking once on the
to the left of that entry
in the list. You will notice that when you select the "gcc C compiler helper"
several other packages are automatically selected. This is correct behavior,
DO NOT deselect packages that are automatically added by the tool.
After pressing beside "gcc C compiler helper"
the contents of your window should be consistent with the window shown below.
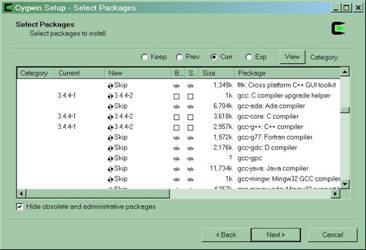
Notice that several other packages in the list have been automatically
selected for you. These packages are necessary for the correct functioning of the C compiler.
The packages you will need and the groups (group names in bold type) in which they may be
found are listed below:
- Archive: unzip, zip
- Devel: ddd, gcc C compiler upgrade helper, gdb, splint
-
- Graphics: ghostscript, ghostscript-X11, freeglut
-
- Net: openssh, ping
- System: rebase
- Text: aspell
- X11: X11-start-menu-icons, xorg-x11-f100, xorg-x11-fscl,
xorg-x11-fsrv, xorg-x11-man, xpdf
- Once you have selected all the packages you want press “Next”. The necessary files will be
downloaded and then Cygwin will be installed on your Windows computer.
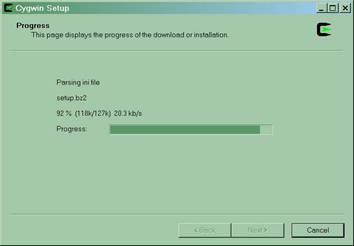
While the setup tool is downloading and installing it will show you windows indicating
how things are going.
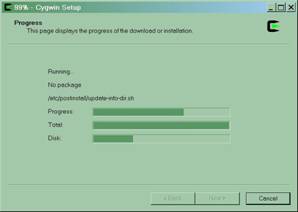
The window will tell you which package is being downloaded or
installed and how much of that download or install has been completed. The “total” bar
shows how much of the total download and install of all requested packages has been completed.
The window above illustrates the final step of the install process when the new software
is being integrated into your Windows computer. It will take quite a while to download and
install (may be in excess of 1 hour) so you may want to go for coffee at this point.
When the installation is complete the following window will appear, asking if you want
a Cygwin icon on your desktop or in your start menu.
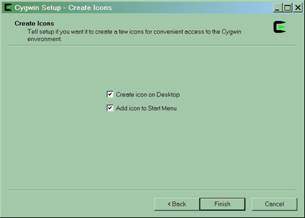
Once you have selected where you would prefer to put your Cygwin icon, press “Finish” to
complete the installation. You now have a version of Cygwin you can use to access the CSIL
computers.
IMPORTANT WARNING ABOUT A COMMON PROBLEM:
The setup tool has some shortcomings. Sometimes the download will stop part way through.
If this happens the following window may or may not appear on top of your download progress window
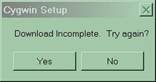
If the window does not appear press the "Cancel" button on the download progress window (see step 17).
If the window does appear press “Yes” to continue. In the latter case it is likely that the setup tool will
not restart properly and the following windows will appear
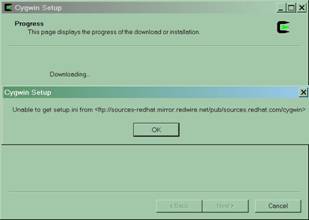
Simply press “OK” to exit the setup tool. After pressing "Cancel" or "OK" you will then need to start again
from the beginning.
In some cases the tool will not complete if you spend too long selecting packages. If you have this
problem, or your download and install repeatedly does not complete,
I suggest you work in steps. Choose the default and only a couple of the additional packages and install
those first. The install tool remembers what you have already successfully installed. You can add more
packages by running the install tool again. When you add packages only the packages being added are
downloaded and installed (added to all those packages already installed).
Adding Kate to Cygwin
In order to use the Kate editor at home you need to add the necessary software to your Cygwin Installation.
To add Kate to your Cygwin installation complete the following steps
- Download the following packages using the links below. Download these packages directly to c:\cygwin,
or download them to a location of your choice and them move them to c:\cygwin.
- Open a Cygwin window by selecting the Cygwin icon
 on your
desktop or in your start menu (depending on where you chose to save it).
It may take a couple of minutes for the Cygwin system to initialize the first time you open a
Cygwin window. It will take longer for the Cygwin window to initialize the first time you open
a Cygwin window. The first time you open a Cygwin window it should look like the window below. on your
desktop or in your start menu (depending on where you chose to save it).
It may take a couple of minutes for the Cygwin system to initialize the first time you open a
Cygwin window. It will take longer for the Cygwin window to initialize the first time you open
a Cygwin window. The first time you open a Cygwin window it should look like the window below.
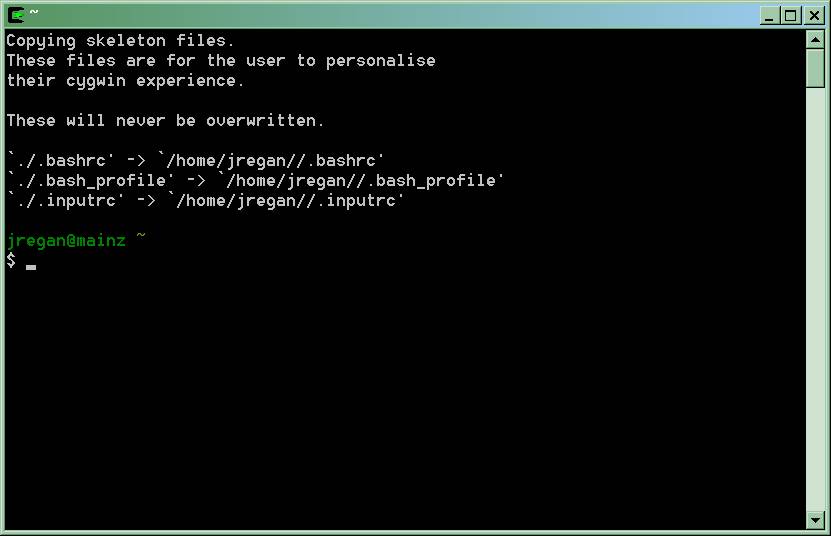
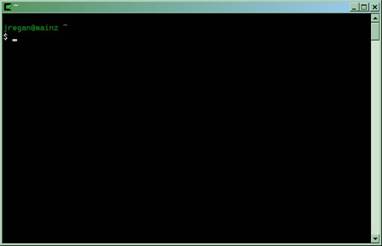
Any time you open a Cygwin window after the first time it should look like the window below
- The packages you have downloaded are in a compressed format and must be uncompressed and copied to
the correct locations. You can complete this uncompress and copy step by executing each of the
following commands in your Cygwin window. To execute the commands simply type one command
(one line) into the Cygwin window then press the enter key and wait for the prompt before repeating
the process with the next command (the next line).
cd C:/cygwin
tar -C / -xjf qt-x11-free-3.3.4-1.tar.bz2
tar -C / -xjf kdebase-3.4.1-0.tar.bz2
tar -C / -xjf kdelibs-3.4.1-0.tar.bz2
tar -C / -xjf kdepim-3.4.1-0.tar.bz2
tar -C / -xjf kdesdk-3.4.1-0.tar.bz2
tar -C / -xjf lnk2desktop-1.0.0.tar.bz2
- Modify your Cygwin system to connect the new packages you just added.
First make a list of things that need to be added by executing the following command.
find /opt/qt/3.3 /opt/kde3.4 -name '*.dll' > /tmp/files.lst
Your list will be saved where the operating system can use it,
you will not see the list in your Cygwin window.
- Important: Close the Cygwin window,
and any other Cygwin windows that may be open before proceeding to the next step.
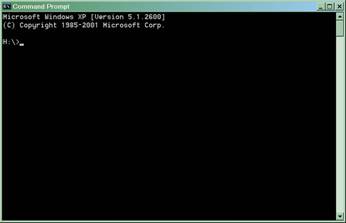
- Open a windows command shell (cmd.exe). Select programs on your Start menu, then select accessories,
then select command prompt. Making these selections will open a window like the one below
- Move to your cygwin directory by typing the command
after the prompt (>). After typing the command press the enter key.
-
- To complete the installation of the additional necessary software enter the command
bin\ash bin/rebaseall -b 0x61000000 -v -T tmp/files.lst
after the prompt (>). After typing the command press the enter key. Several pages of information will
scroll past as the command is executed. Wait until nothing else appears to be printing to the command
window. Wait about 30 seconds more to be sure then close the command window. (Close not minimize).
- Now all that remains to be done is to provide a series of instructions for Cygwin.
These instructions tell Cygwin how to start up to toolbar on which you will be able to access Kate.
To add these instructions to your Cygwin system by doing to following:
- Download the file startkde to your computer
- Move the file startkde to your home Cygwin directory (c:\cygwin\home\your_user_id).
This is the directory in you are in immediately after opening you Cygwin window,
before you enter any commands.
- Open a Cygwin window
- Type the command
You should see the file startkde among those listed, if you do not
move the file startkde to your home directory now.
- Execute the command below in your Cygwin window
This command makes your file startkde executable
(so you can start kde and run the Kate editor)
-
Your Cygwin system should now be ready to use.
For instructions on how to use your cygwin system go back to the "Approaches to completing assignments and labs section of the
previous page
* CMPT 102 Information Page
*
Course Central
*
Computing Science Home
*
Janice Regan, last modified September 4, 2006
|