cmpt165
Spring 2007
CMPT 165-D2 @ Surrey Assignments
Due Date:
Monday, February 26th by 11:59pm (submit via WebCT and the course web server, see below).In this assignment, you will create a web page containing a "pretend" blog. Typically, blogs are created by software that arranges stories, moves stories into archives, keeps track of comments, and so on. Your page will just be a static XHTML file (by "static" we mean that there will be no web interface like a real blog).
Of course, blog software has to produce HTML or XHTML out of whatever data it stores. This assignment is basically to do the blog software's job, without the interactive part. That is, you are going to create the XHTML code for the front page of a blog.
For example, when we're done, the page might look like this (but you are free to apply your own style and designs to the blog):
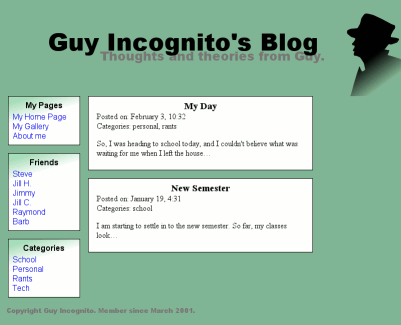
Part 1: Markup
Create an XHTML page representing the front page of a blog. As usual, worry only about content at this point: we will create stylesheets later.
You can use the content from the screenshot above if you want. You can also make up your own blog content, but the general parts should be the same: title, link lists (these should be set up like links, though for this assignment they do not necessarily have to link to an existing site: for example, you might use <a href="dummy_link.html">, etc. -- that is, not a real link, but something that will appear as a link on your XHTML page), stories/posts. If you want to use the content from the screenshot above, the text from the example page can be downloaded, just to save you some typing.
Your XHTML must be valid XHTML 1.0 Strict. As usual, you should use tags to match the meaning of the content.
Part 2: Stylesheets
You will create two different stylesheets for your page. Thus the content in the XHTML file should be independent of its appearance. You must use the same XHTML with both stylesheets.
You may have to go back and edit your XHTML while creating the stylesheets. In theory, you should only have to add some class and id attributes, or some <div> tags.
We will be looking for a reasonable level of difficulty in the stylesheets. In particular, you should do some positioning of elements on the page (typically starting with the float or position properties).
The two stylesheets must be reasonably different: you should do more than just change some colours or fonts between the two. Try for an overall different layout: each page will use the same markup, but they will have very different structures.
You do not have to make the page look like the screenshot above. It is provided only as a general example of what a blog looks like.
Use the CSS validator to make sure you CSS files are valid stylesheets.
Submitting
You can make two copies of the XHTML file, with the only difference being the linked stylesheet. Make sure you send the URL of both pages. There is also a more “elegant” solution available…
It is possible to have two distinct stylesheets for a single XHTML file. The code for doing it is like this:
<link rel="stylesheet" href="my_style1.css" title="Style 1" type="text/css" media="all" />

<link rel="alternate stylesheet" href="my_style2.css" title="Style 2" type="text/css" media="all" />
In Firefox, you can choose which stylesheet to use by selecting View → Page Style. (You can try that on any page on the course web site: there are several stylesheets available.)
If you are going to do this, make a note in your readme.txt file, so we know to look for the alternate stylesheet (not a second XHTML page).
Submission
When you're done the assignment, make sure that you have saved all of your files in a single directory. You must add one more file to this directory that you must call "readme.txt". You can create this file using Notepad on a PC (or TextEdit on a Mac). In this file you will put your full name, student number and the URL of your assignment (e.g. "http://cmpt165.cs.sfu.ca/~kvoll/assign2_page1.html" -- note that you must check to make sure that all of your necessary files were uploaded correctly).
Once you have created the README file and saved it to your directory, you can then zip that directory. To do so, right-click on the file and select "Add to filename.zip" (note, if this option does not appear you do not have WinZip installed on your computer -- click on this link to download and install it). This will create a new file called "filename.zip", where "filename" is the name of your directory. If you are a Mac user, you will right-click and select "Create Archive of filename", which will do the same thing. Once you are done zipping the file, you can submit your assignment via the Assignments section of WebCT (there you will see an assignment called 'Assignment 2'). You should give your zip file a name indicating the assignment number, as well as your user ID (since this is unique to you). For example, if I was creating a zip file to submit for this assignment I would call my file "assign2_kvoll.zip".
Note, do not email your assignment to anyone, not even the submission email address -- thanks!